

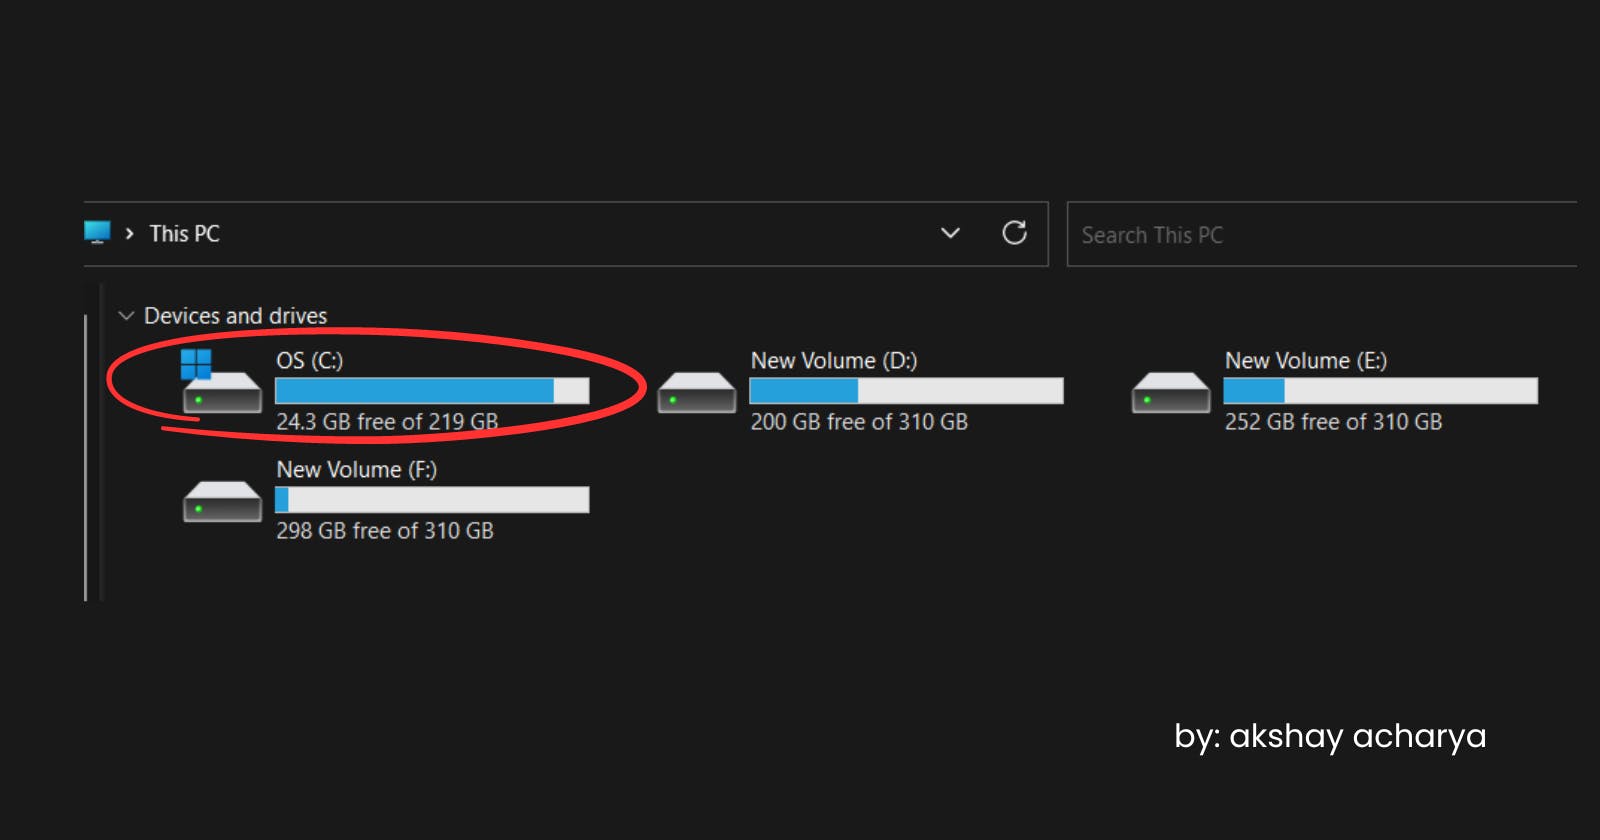


Is your Windows PC/Laptop displaying a message that says "You are running out of space on Local Disc (C:)..."? If this is the case, it means that your C drive is full. you might not be able to install important Windows updates, and your PC’s performance may be affected. Here are some steps/ways you can take to remove unnecessary files and free up storage. so you can keep your PC up-to-date and running smoothly.
Disk Cleanup:
Windows operating systems have a built-in tool called Disk Cleanup that helps you remove temporary files, system files, and other unnecessary data.
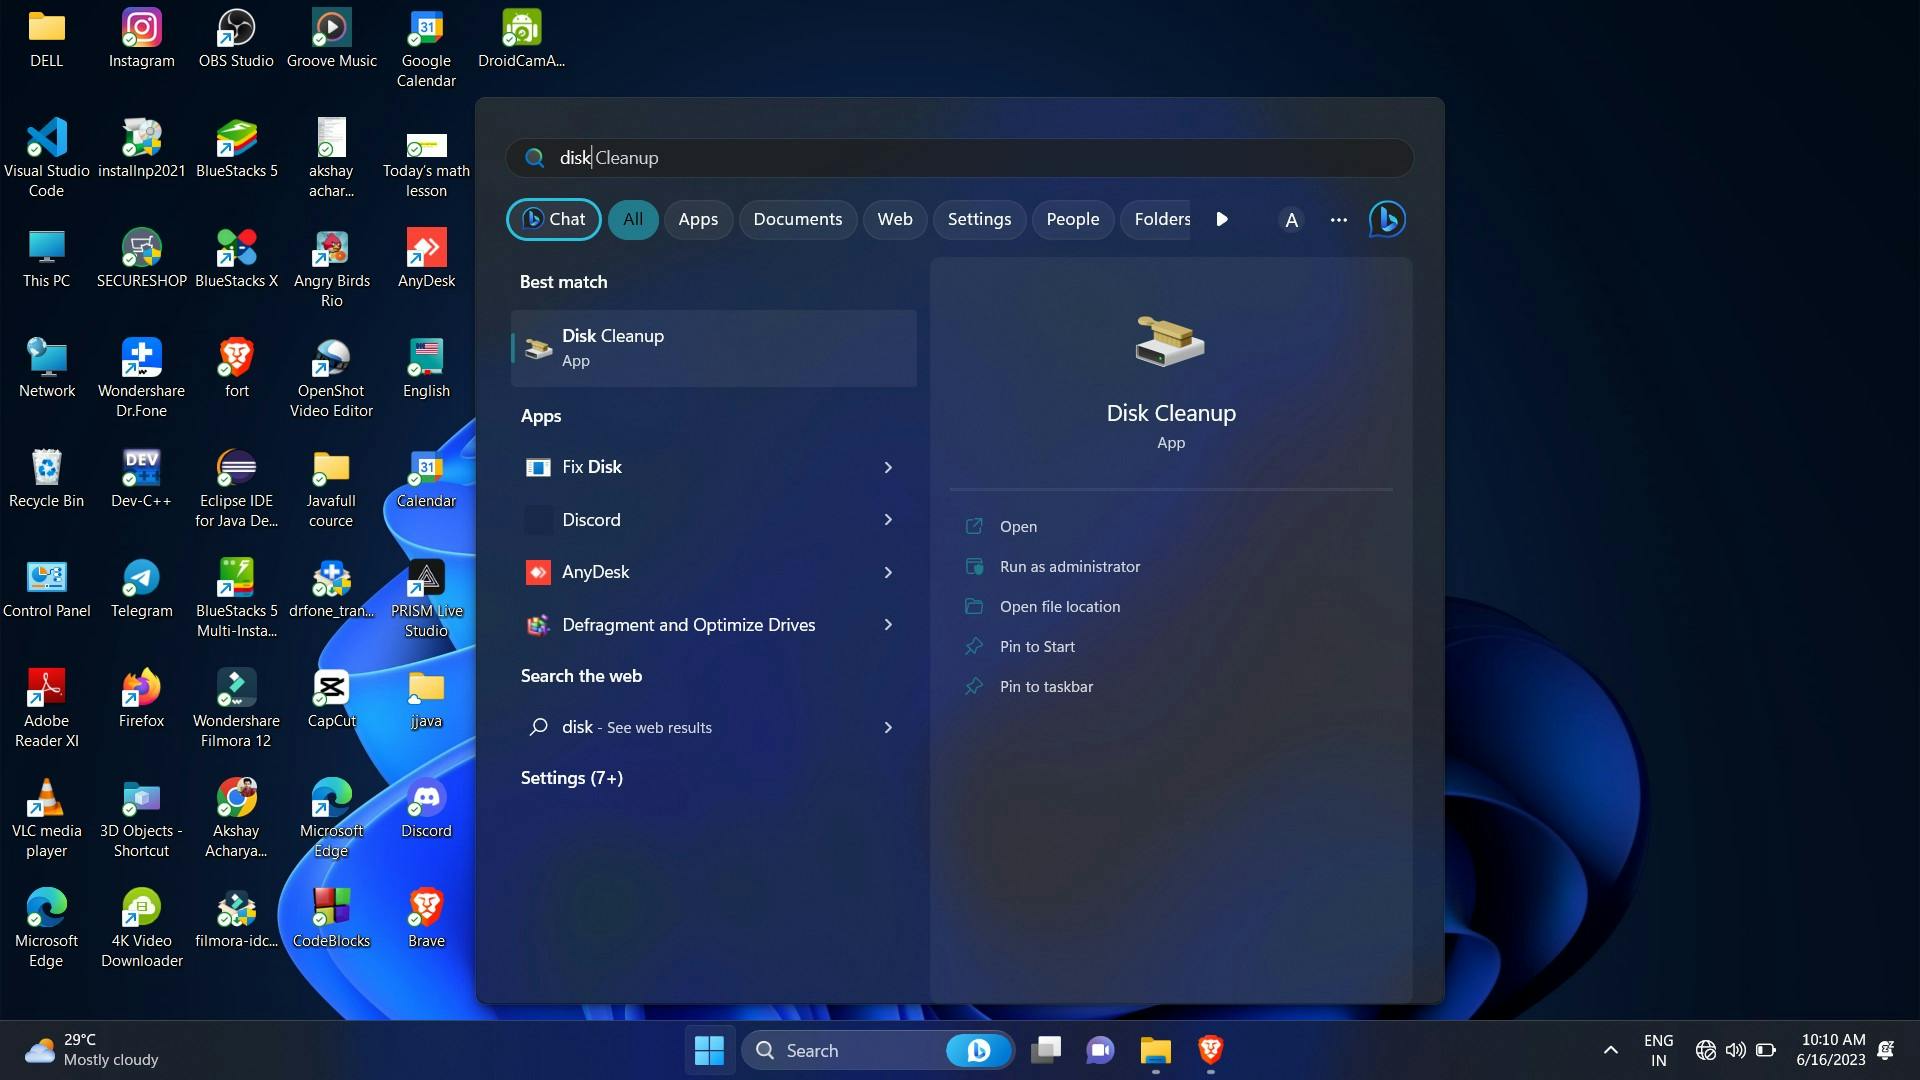
1. Type "Disk cleanup" in the Start menu search bar
2. Right click on
Disk cleanupand Run as administrator3. Select Local Disk (C:) from the disk selection menu and click ok.
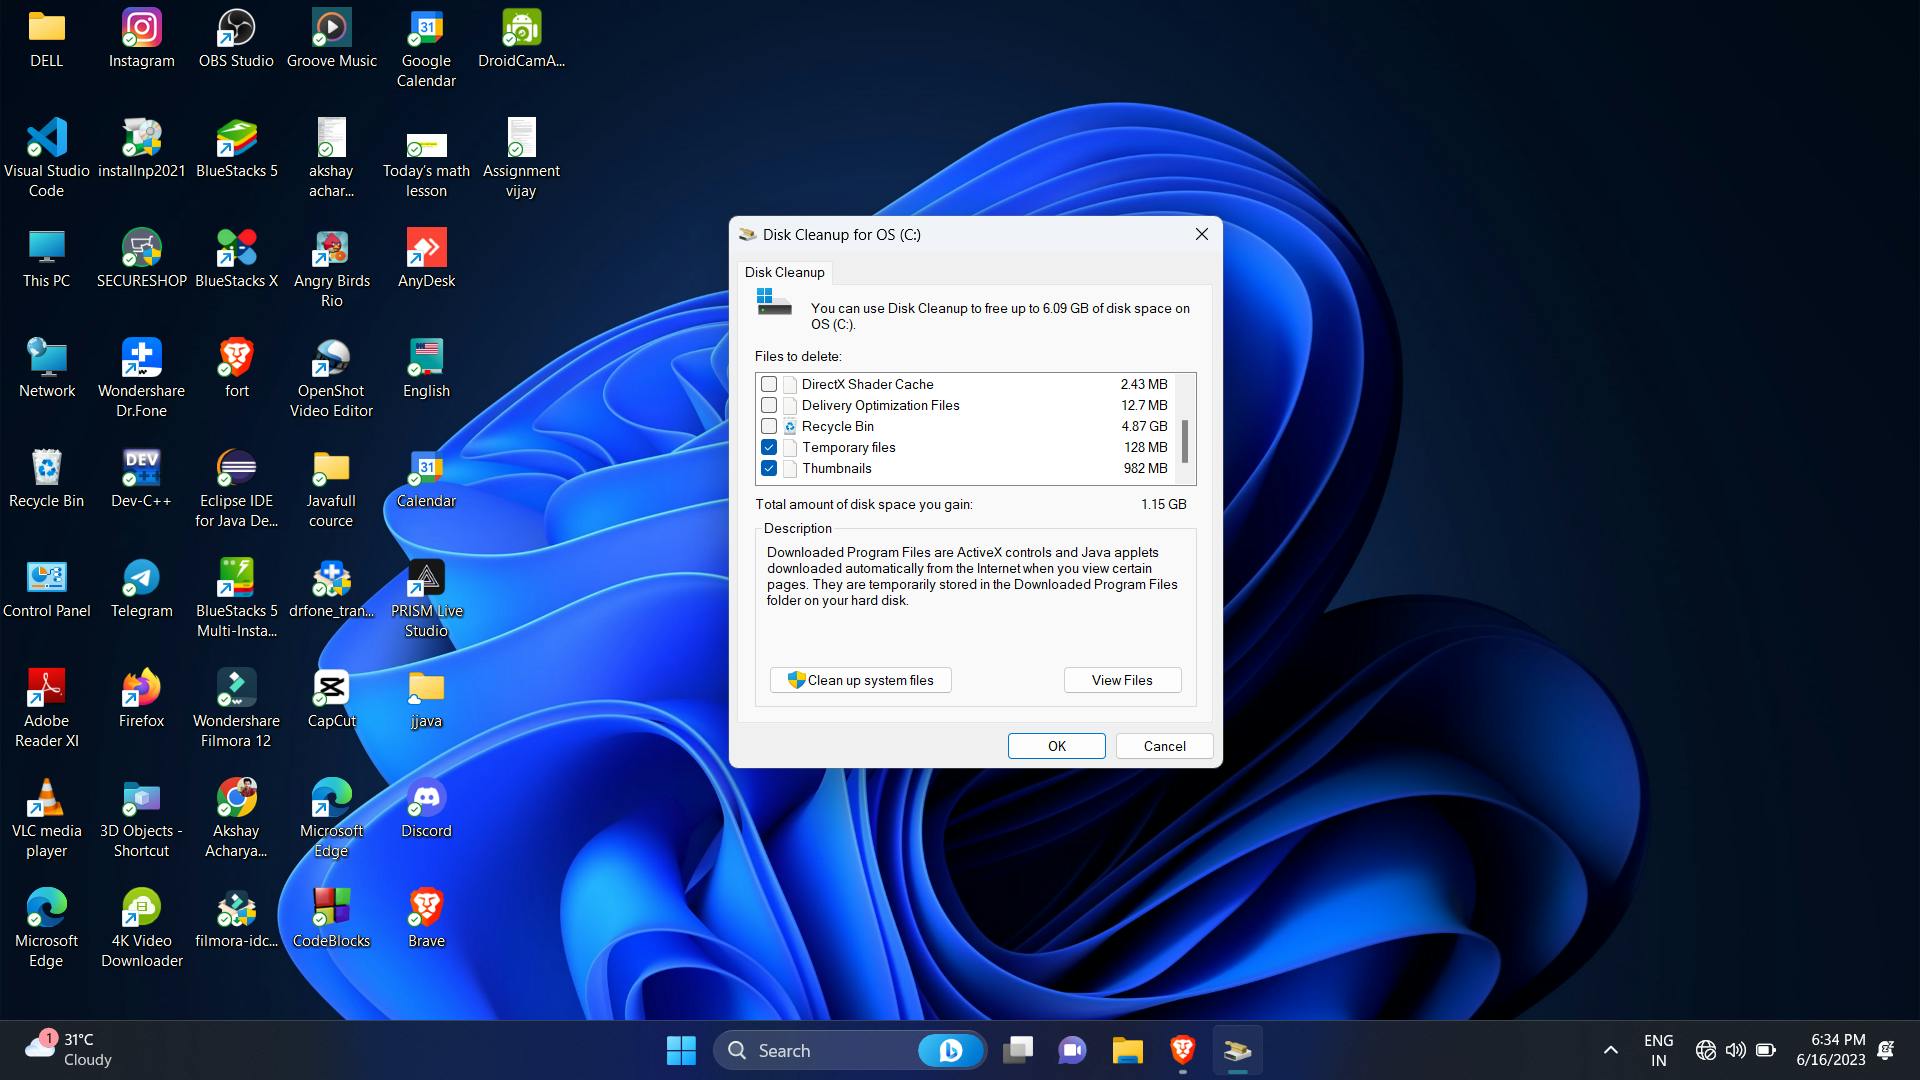
Under Files to delete, click options such as temporary internet files, thumbnails & previous window installation & update
Note: that you won't be able to roll back Windows updates if you check the Windows Update Cleanup option.
Click on ok and next prompt click on Delete files
It may take some time for Disc Cleanup to remove all of your data, especially if you installed a new version or restarted Windows 10.
Regularly using Disk Cleanup can help you maintain a clean and optimized C drive, ensuring that you have enough space for new applications, files, and system processes.
Delete Temporary Files:
Temporary files are created by programs when they are running. These files are usually deleted when the program exits, but sometimes they can be left behind.
Press the Windows key + R, type "%temp%" (without quotes), and hit Enter. This will open the temporary files folder.
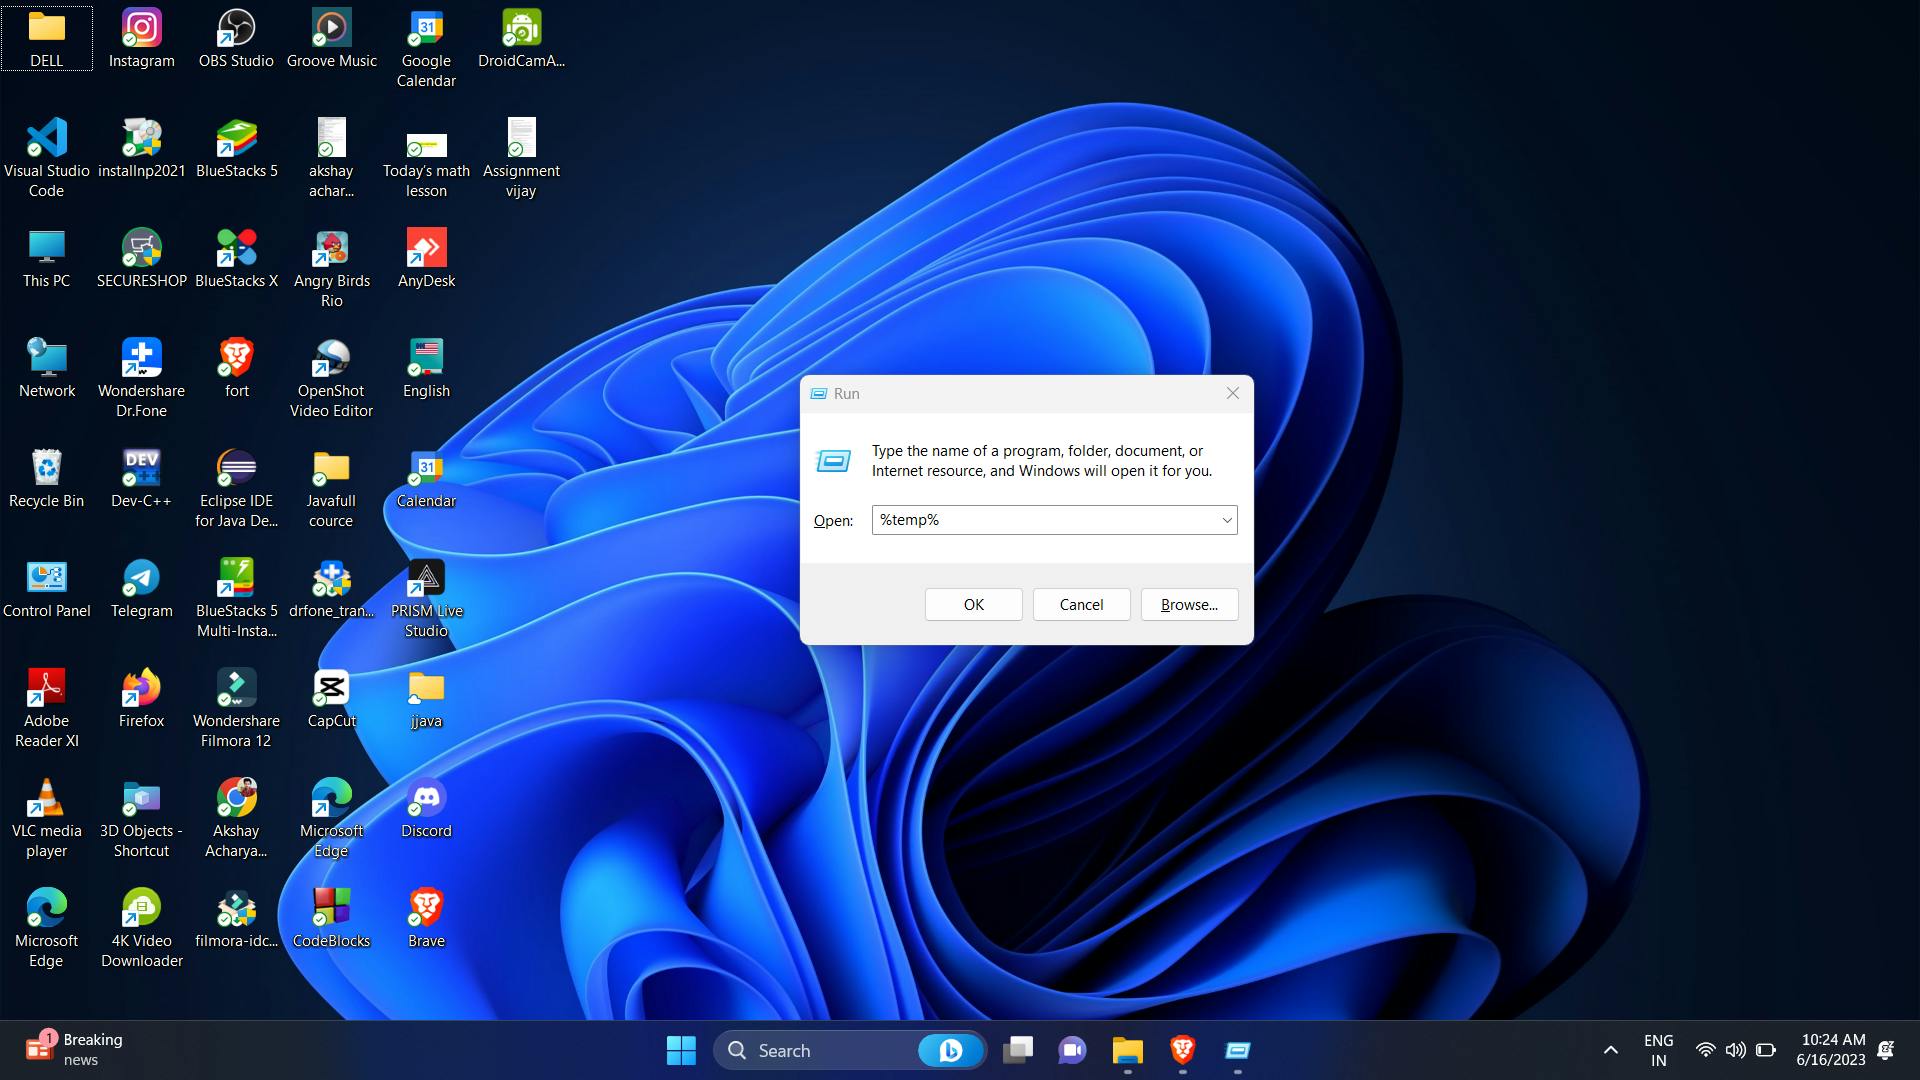
Select all files and folders in it, then press Shift + Delete to permanently remove them.
Use CHKDSK to Find File System Errors
When your laptop's C drive is full, it can lead to various issues, including slow performance and system errors. CHKDSK (Check Disk) is command-line utility that can be used to scan and repair hard drive(HDD) errors.
It is a built-in tool in Windows operating systems, and can be run from the Command Prompt or Windows PowerShell.
This includes the incorrect reading of free disk space and storage allocation issues. To fix this, you can perform a CHKDSK scan using Windows Command Prompt or Windows PowerShell.
How to Run CHKDSK from command prompt:
Type cmd in windows search bar
Right-click on Command Prompt > Run as administrator.
In the CMD console, enter chkdsk C: /f and press Enter.
CHKDSK will scan the C: drive for any errors and automatically fix them upon detection.
Restart your computer after the scan is completed.
Here are some additional points you should know:
CHKDSK can take a long time to run, so it is best to run it when you do not need to use your computer.
CHKDSK cannot fix all hard drive errors. If CHKDSK finds errors that it cannot fix, you may need to replace the hard drive.
If you are using a laptop, you may need to connect the laptop to an external power source before running CHKDSK. This is because CHKDSK can use a lot of power, and running it on a battery could drain the battery.
Clear Browser Cache:
When you browse the internet, your web browser stores temporary files, images, scripts, and other web page elements in a cache. The purpose of the cache is to speed up your browsing experience by loading previously visited websites more quickly.
However, over time, this cache can accumulate and consume a significant amount of storage space on your laptop's C drive. Clearing the browser cache can help free up space and potentially resolve issues related to slow browsing or outdated website content.
Here's how you can clear the browser cache in popular web browsers:
Google Chrome:
Open Chrome browser
Click on the three-dot menu icon in the top-right corner of the browser window.
Hover over "More tools" and select "Clear browsing data" from the submenu.
In the Clear browsing data dialog box, ensure that the "Cached images and files" box is checked. You can also select other items you want to delete, such as browsing history or cookies.
Choose the time range for which you want to clear the cache. If you want to remove all cached data, select "All time."
Click the "Clear data" button to delete the selected cache items.
Mozilla Firefox:
Open Mozilla Firefox.
Click on the menu icon (three horizontal lines) in the top-right corner of the browser window.
Select "Options" or "Preferences" from the menu.
In the left-hand sidebar, click on "Privacy & Security."
Scroll down to the "Cookies and Site Data" section.
Ensure that the "Cached images and files" box is checked. You can also select other items to clear, such as cookies or browsing history.
Click the "Clear" button to delete the selected cache items.
Microsoft Edge:
Open Microsoft Edge.
Click on the three-dot menu icon in the top-right corner of the browser window.
Select "Settings" from the menu.
In the left-hand sidebar, click on "Privacy, search, and services."
Under the "Clear browsing data" section, click on the "Choose what to clear" button.
Ensure that the "Cached images and files" box is checked. You can also select other items to clear, such as cookies or browsing history.
Click the "Clear" button to delete the selected cache items.
Clearing the browser cache will remove stored website data, forcing your browser to fetch fresh content from websites. This can help resolve issues like outdated web pages, improve loading times, and free up storage space on your laptop's C drive.
Uninstall Unnecessary Programs:
Uninstalling unnecessary programs is an effective way to free up storage space on your laptop's C drive and optimize its performance.
Here's a step-by-step guide on how to uninstall unnecessary programs:
Step 1: Open the Control Panel
Step 2: Access the Programs and Features Section
Step 3: Identify Unnecessary Programs
Step 4: Uninstall the Programs
Step 5: Repeat for Other Unnecessary Programs
Repeat the uninstallation process for each unnecessary program you identified in Step 3.
Step 6: Restart Your Laptop
Thanks for Reading:)